You can enable or disable the CDN functionality anytime while using the plugin. If you SYNC your files for first-time use enable the CDN function.
You have completed the first step by installing the plugin and purchased the API key. What’s next? Of course to synchronize your files for the first use. To do this, press the “SYNC MY FILES” button under the SYNC tab. That’s all you have to do. The plugin will compress your files and send them to us to be sent to CDN. You can be sure that CDN synchronization through the API will take place at lightning speed.
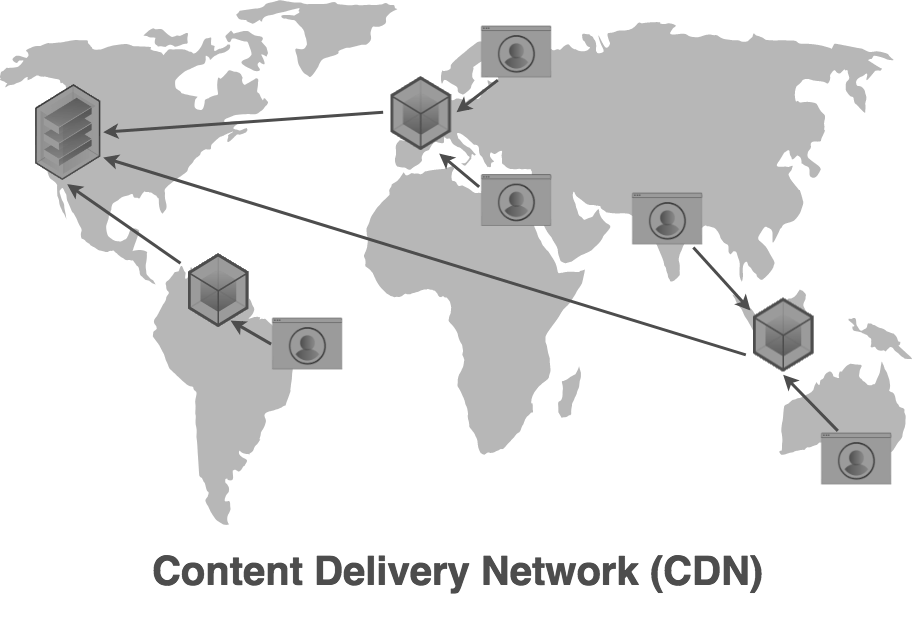
CDN Bull – Regional Availability
CDN Bull provides S3-compatible object storage which lets you store and serve large amounts of data. You can create them in a few seconds and use them immediately with no configuration. Data transfer is automatically secured with HTTPS, and the available storage capacity scales seamlessly.
CDN Bull is available in NYC3, SFO3, AMS3, SGP1, and FRA1.
The CDN Bull points of presence are in the following locations:
| Region | PoP Locations |
|---|---|
| North America | Ashburn, Atlanta, Chicago, Dallas, Denver, Los Angeles, Miami, New York, San Jose, Seattle, Toronto |
| Europe | Amsterdam, Frankfurt, London, Madrid, Milan, Paris, Stockholm, Warsaw |
| South America | São Paulo (beta) |
| Asia | Hong Kong (beta), Manila (beta), Seoul (beta), Singapore (beta), Tokyo (beta) |
| Oceania | Melbourne (beta), Sydney (beta) |
Registration on our website is completely free. But in order to use CDN features on your website, you must upgrade your account.
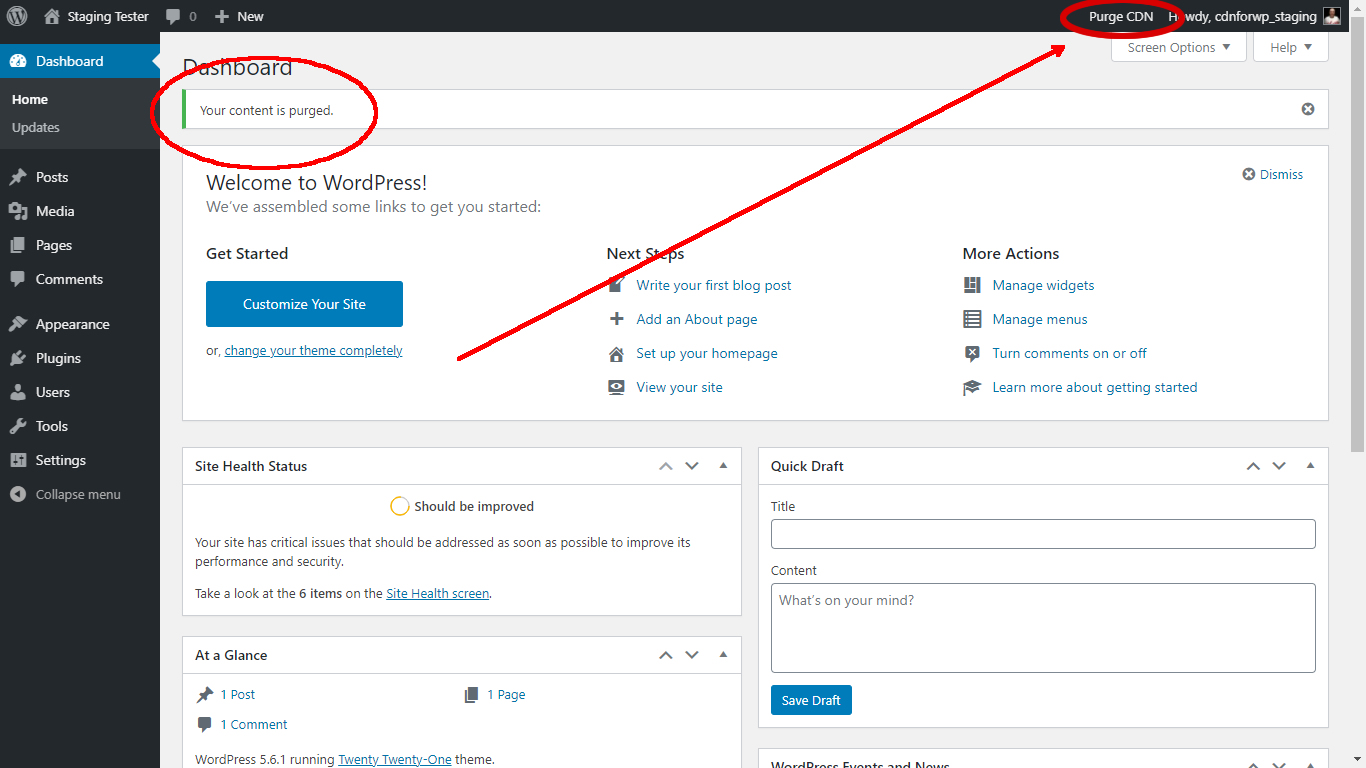
The cache on the CDN side may need to be cleared when your files are updated or when you make a new sync. In this case, it is sufficient to press the “Purge CDN” button in the upper right corner of the management panel, which you can see in the screenshot.
You have installed the “CDN Bull” plugin, done the first synchronization and everything is ready. So what do you need to do when you install a new plugin or theme? Here is the answer to your question; Just press the “SYNC MY FILES” button as in the first synchronization. The system will automatically sync all your files onto CDN.
The “CDN Bull” plugin will automatically sync your new media files to the CDN. After you upload your file from the media upload section, our plugin is automatically sending the newly uploaded file to CDN. You don’t need to do anything afterward.
After uploading your file, you don’t need to do anything while adding it to the content. You just need to add it to the content and save it. When visiting your website, you can see that these media files have been replaced by CDN versions.
How can I get the API Key for my web site?
First of all, make sure that the plugin is installed on your site. After installing our plugin, go to the “CDN for WP” section under the “Settings” tab in the menu. In the main settings section that opens, if you have not entered an API key before, you must click the “GET NEW KEY” button and complete the membership process on the page opened. If you have completed your membership process, you can add your website under the link https://cdnbull.com/my-sites/. After defining your website to the my-sites link, you can start using the CDN by entering the unique API key produced for you in the relevant section on your website. At this stage, the API key you have purchased will be controlled by the plugin.
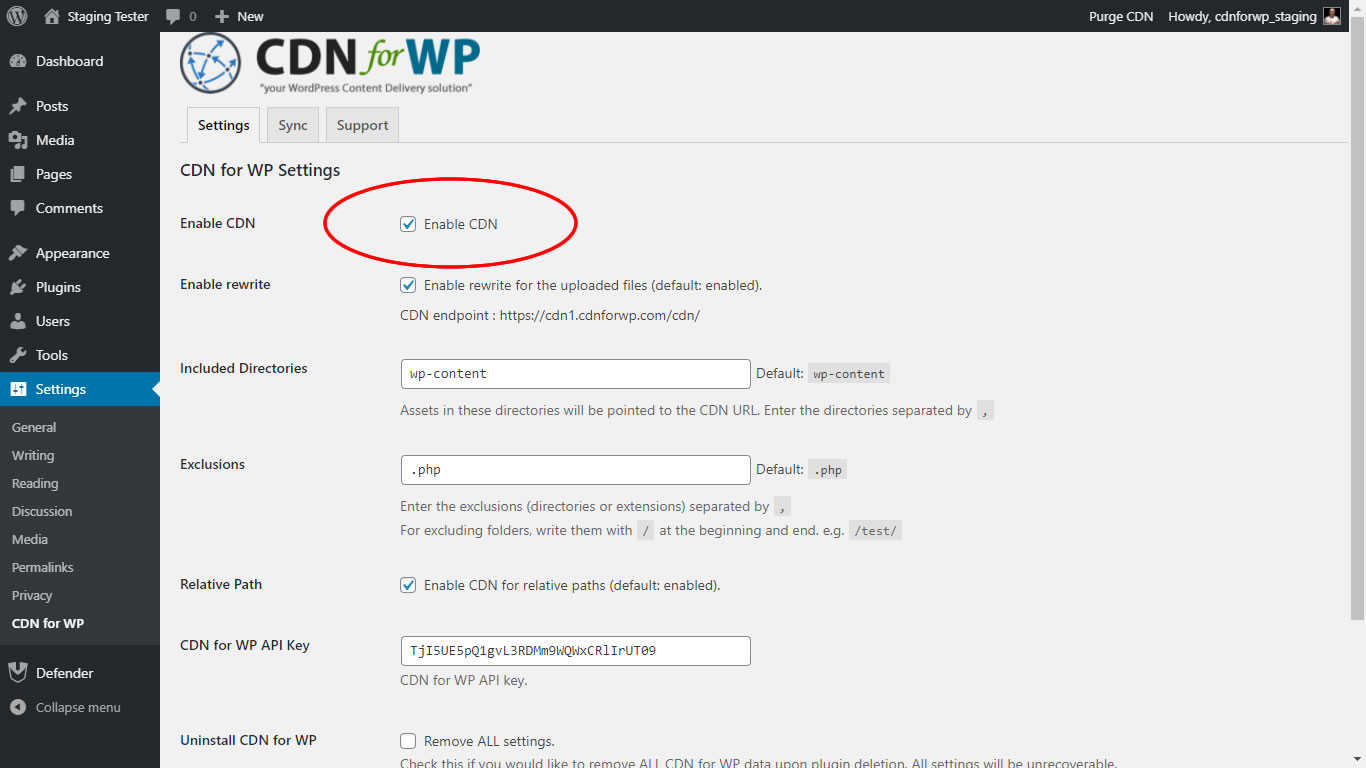
In some cases, you have to turn off CDN usage. Just remove the “Enable CDN” checkmark under Settings and save. This will temporarily stop using the CDN. Please note that your newly added media files will not be synced to the CDN.
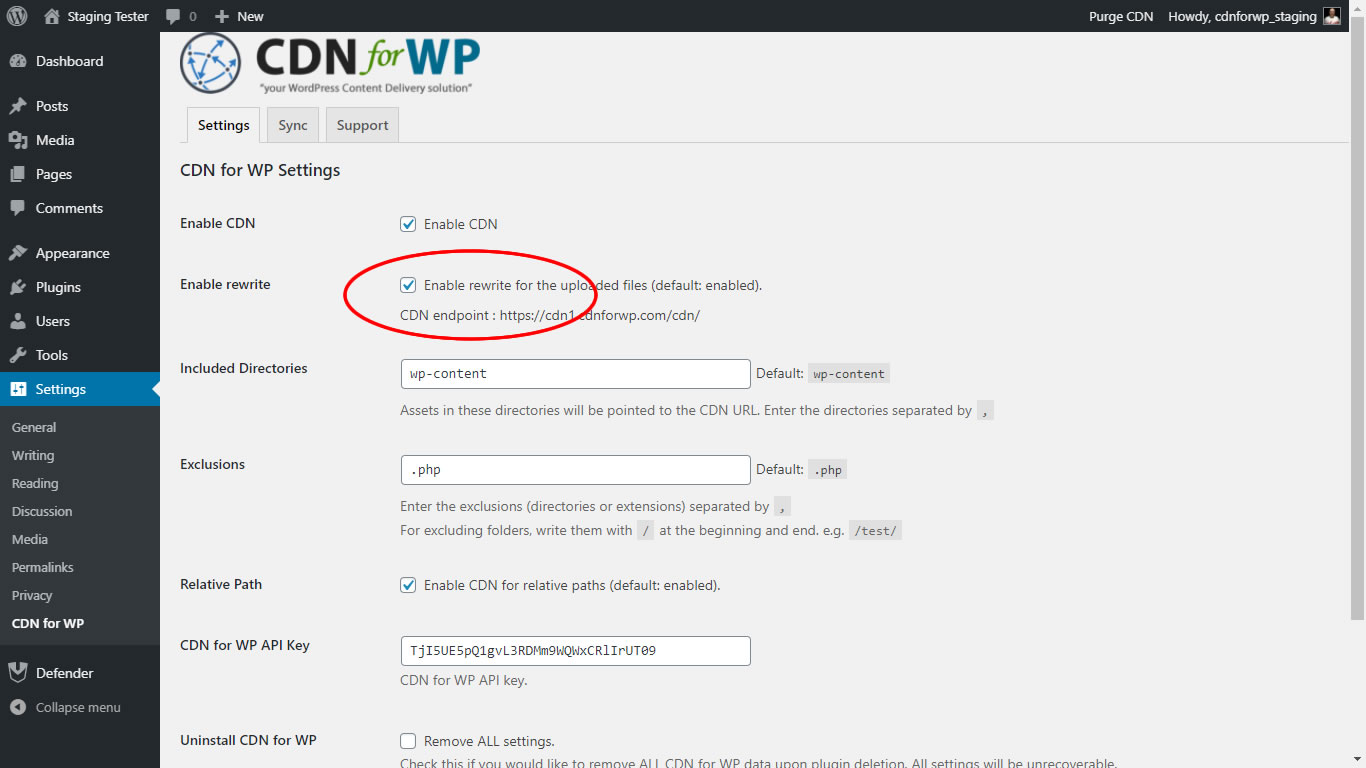
In some cases, you need to turn off the rewrite feature. This process does not affect background CDN processes, so your newly added media files will continue to sync to CDN automatically. If you already have a CACHE plugin that you use, you can make the CACHE plugin use the CDN by entering a rewrite URL into this plugin. The URL you need is specified in the description of the “Enable rewrite” setting in the settings section. Of course, to see this setting, you must have purchased a new API KEY from our website and have an active subscription.
You can easily install our plugin to your WordPress website. Also, you can download it from the WordPress repository with this link.
You can uninstall our plugin anytime. Please send your feedback via email -> info@cdnbull.com
Monthly subscriptions
If you’d like a refund, contact us first and do not remove your domain. We will work with you to evaluate your case and issue a refund if needed.
When refunds will be considered
- If you were just charged for your next month of subscription, but you meant to cancel, please contact us and we will review your case.
When refunds aren’t granted
- Contact us for a refund after removing the domain.
Annual subscriptions
When you sign up for an annual up-front commitment, we offer you a significant discount over the already-low monthly subscription cost. If at any time during your first 15 days using our service you are dissatisfied, please contact us.
An exception to our refund policy
Please note that we will not issue a refund when we have suspended or terminated your access to CDN Services due to a violation of our terms of service, or due to circumstances that are beyond control.
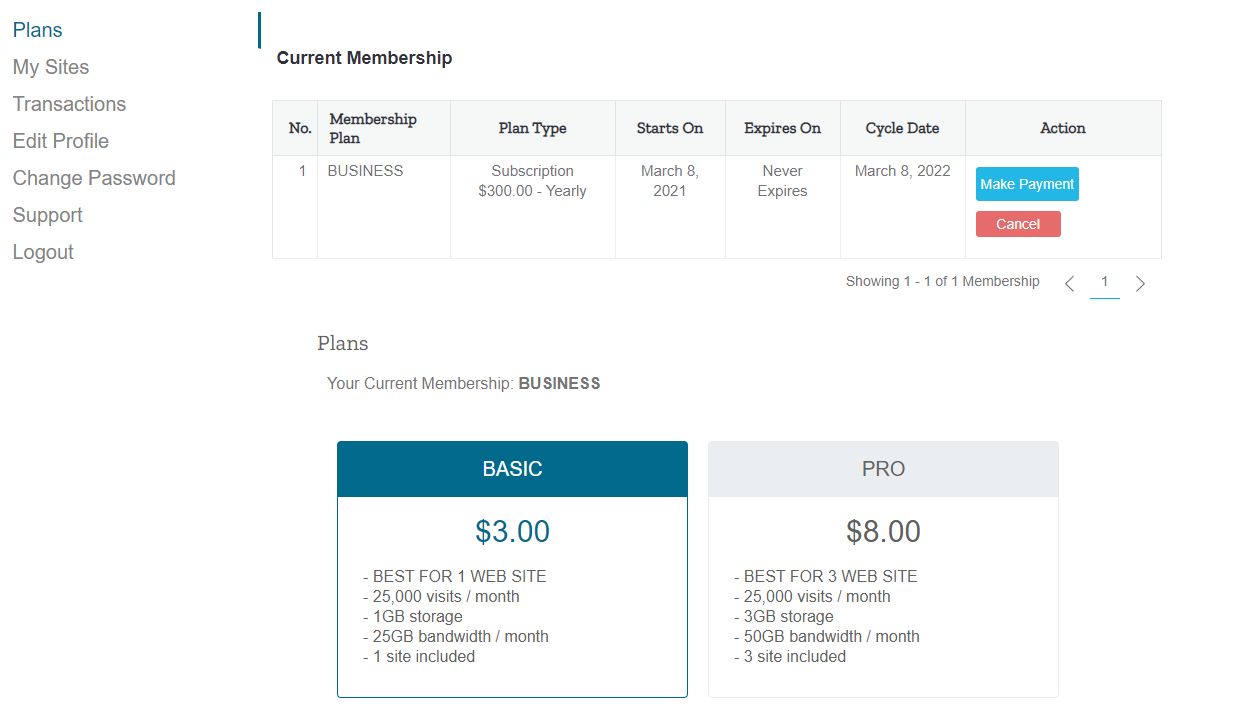
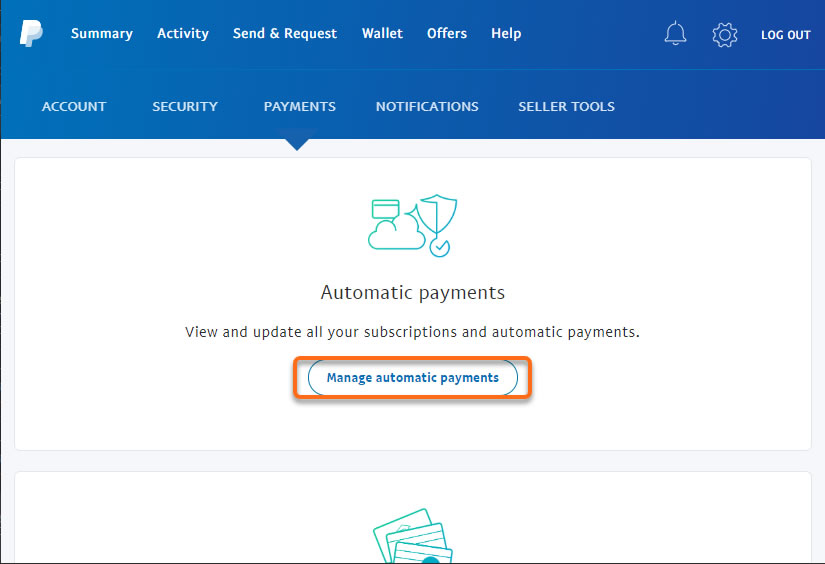
Can I unsubscribe or cancel my payment?
You can manage the subscription via this link.
Press the CANCEL button on the plans section. This will operate the PAYPAL unsubscription automatically.
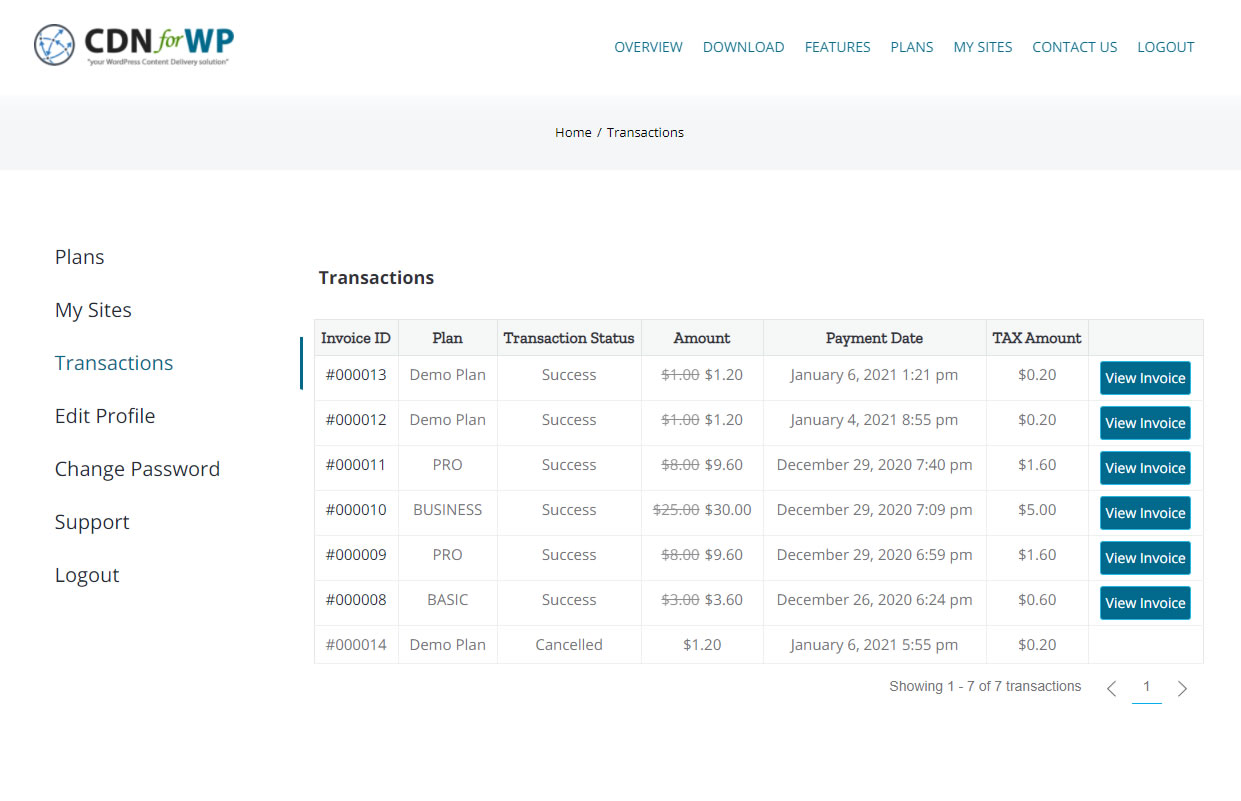
You can access all your invoices by navigating to Transactions. Once you found the invoice you’re looking for, click the view invoice button. You can print the invoice y the print button.